


반응형
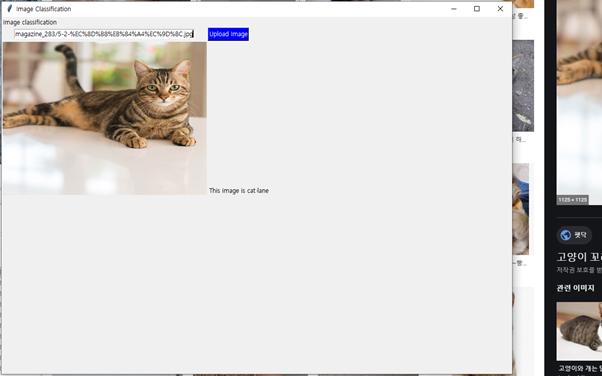
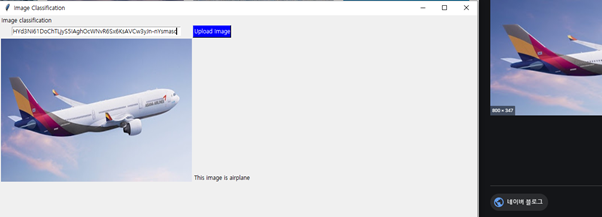
이미지 파일을 업로드하면 CIFAR-10 의 레이블중 하나를 예측하여 보여주는 소프트웨어를 개발
예측 모델은 전이학습을 이용하여 만들고 CIFAR-10을 이용하여 학습
"""
Created on Sun Dec  6 02:22:39 2020

@author: Changmin
"""
from urllib.request import urlopen
from tkinter import *
import requests
from PIL import Image, ImageTk
from io import BytesIO

from keras.engine import Model

from keras.preprocessing.image import img_to_array

from tensorflow.keras.applications.efficientnet import preprocess_input

import io

def decode_pred(pred):
    arr = ['airplane','automobile','bird','cat','deer','dog','frog','horse','ship','truck']
    index = pred.argmax() #0,1
    #label = [arr[index], pred[0,index]]
    return arr[index]

def click():
    image_url = str.get()
    data = urlopen(image_url).read()
    image = Image.open(io.BytesIO(data))
    img = image.resize((400,300))

    img = ImageTk.PhotoImage(img)
    img_label.configure(image=img)
    img_label.photo = img
    img_label.grid(column=0,row=3, sticky = W+N)


    #이미지 예측#
    ##############################
    # load an image

    image = image.convert('RGB')
    image = image.resize((32,32), Image.NEAREST)

    # convert the image pixels to a numpy array
    image = img_to_array(image)

# reshape data for the model
    image = image.reshape((1, image.shape[0], image.shape[1], image.shape[2]))

    # prepare the image
    image = preprocess_input(image)


    # load model
    from keras.models import load_model
    model = load_model('epoch_80.h5')

    # predict the probability across all output classes
    pred = model.predict(image)

    # convert the probabilities to class labels
    answer = decode_pred(pred)


    L2 = Label(window, text="This image is {}".format(answer))
    L2.grid(column=1, row=3, sticky=W+S)

    window = Tk();
window.title("Image Classification")
window.geometry("1000x700+100+100")
window.resizable(True, True)


str = StringVar()
answer = StringVar()
L1 = Label(window, text="Image classification")
L1.grid(column=0,row=0, sticky=W)

textbox = Entry(window, width=50, textvariable=str)
textbox.grid(column=0,row=1)


img_label = Label(window,image="")

upload_Button = Button(window, width=10, text="Upload Image", fg='white', bg='blue', command = click)
upload_Button.grid(column=1,row=1, sticky = W)


window.mainloop();
<모델>
from keras import optimizers
from keras.datasets import cifar10
from keras.engine import Model
from keras.layers import Dropout, Flatten, Dense
from keras.utils import np_utils
import numpy as np

from keras.preprocessing.image import load_img
from keras.preprocessing.image import img_to_array
from tensorflow.keras.applications.efficientnet import preprocess_input, decode_predictions

from tensorflow.keras.applications import EfficientNetB0

def decode_pred(pred):
    arr = ['airplane','automobile','bird','cat','deer','dog','frog','horse','ship','truck']
    index = pred.argmax() #0,1
    label = [arr[index], pred[0,index]]
    return label

#이미지 예측#
##############################

img_width, img_height = 32, 32

#top false => top layer 삭제
base_model = EfficientNetB0(weights='imagenet', include_top=False, input_shape=(32, 32, 3), drop_connect_rate=0.4)

nb_epoch = 80 # 50 is good
nb_classes = 10

# load dataset
(X_train, y_train), (X_test, y_test) = cifar10.load_data()
y_train = np_utils.to_categorical(y_train, nb_classes)
y_test = np_utils.to_categorical(y_test, nb_classes)

# Extract the last layer from third block of model
last = base_model.get_layer('top_activation').output

# Add classification layers on top of it
x = Flatten()(last)
x = Dense(256, activation='relu')(x)
x = Dropout(0.5)(x)
output = Dense(10, activation='softmax')(x)

model = Model(inputs = base_model.input, outputs= output)


model.compile(loss='binary_crossentropy', optimizer=optimizers.SGD(lr=1e-3, momentum=0.9), metrics=['accuracy'])
model.summary()
model.fit(X_train, y_train, validation_data=(X_test, y_test), epochs =nb_epoch, batch_size=64, verbose=1)

# Final evaluation of the model
scores = model.evaluate(X_test, y_test, verbose=0)
print("loss: %.2f" % scores[0])
print("acc: %.2f" % scores[1])

#  모델 저장하기
from keras.models import load_model
model.save('epoch_80.h5')


from google.colab import files
files.download('epoch_80.h5')
실행화면
모델을 만들 때 efficientnet 모델을 사용하였지만, 소요되는 시간이 너무 많았다.
그래서 방법을 찾던중 colab에서 gpu로 코드를 돌릴 수 있다는 것을 알게되었고, 5시간 정도의 작업이 30분정도로 줄어들어 epoch을 더 늘려 높은 정확도를 얻을 수 있었다.
파이썬 GUI를 처음 사용하면서 url로 불러온 이미지를 어떻게 처리할지 어려웠는데, Byte단위로 읽어와 처리해주고, 표시되는 이미지를 resize하여 동일한 크기로 보이게 하여 gui로 나타낼 때 좀더 간결하게 표현하였다.
또한 decode_prediction시 1000개의 이미지에 맞추어져 있다는 사실을 까먹고 자꾸 이상한 값이 나와 이 문제를 해결하는데 시간이 많이 소요되었다.
728x90
반응형
'공부 > 딥러닝' 카테고리의 다른 글
| 흉부 X-ray 사진으로 폐렴 진단 모델 (0) | 2021.05.09 |
|---|---|
| classification 경진대회 (0) | 2021.05.03 |
| 딥러닝 4 (0) | 2020.10.29 |
| 딥러닝 3 (0) | 2020.10.09 |
| 딥러닝 2 (0) | 2020.09.29 |

아상관없어